
Outdoor LED Lighting Layout Tips for Parking Lots and Access Roads
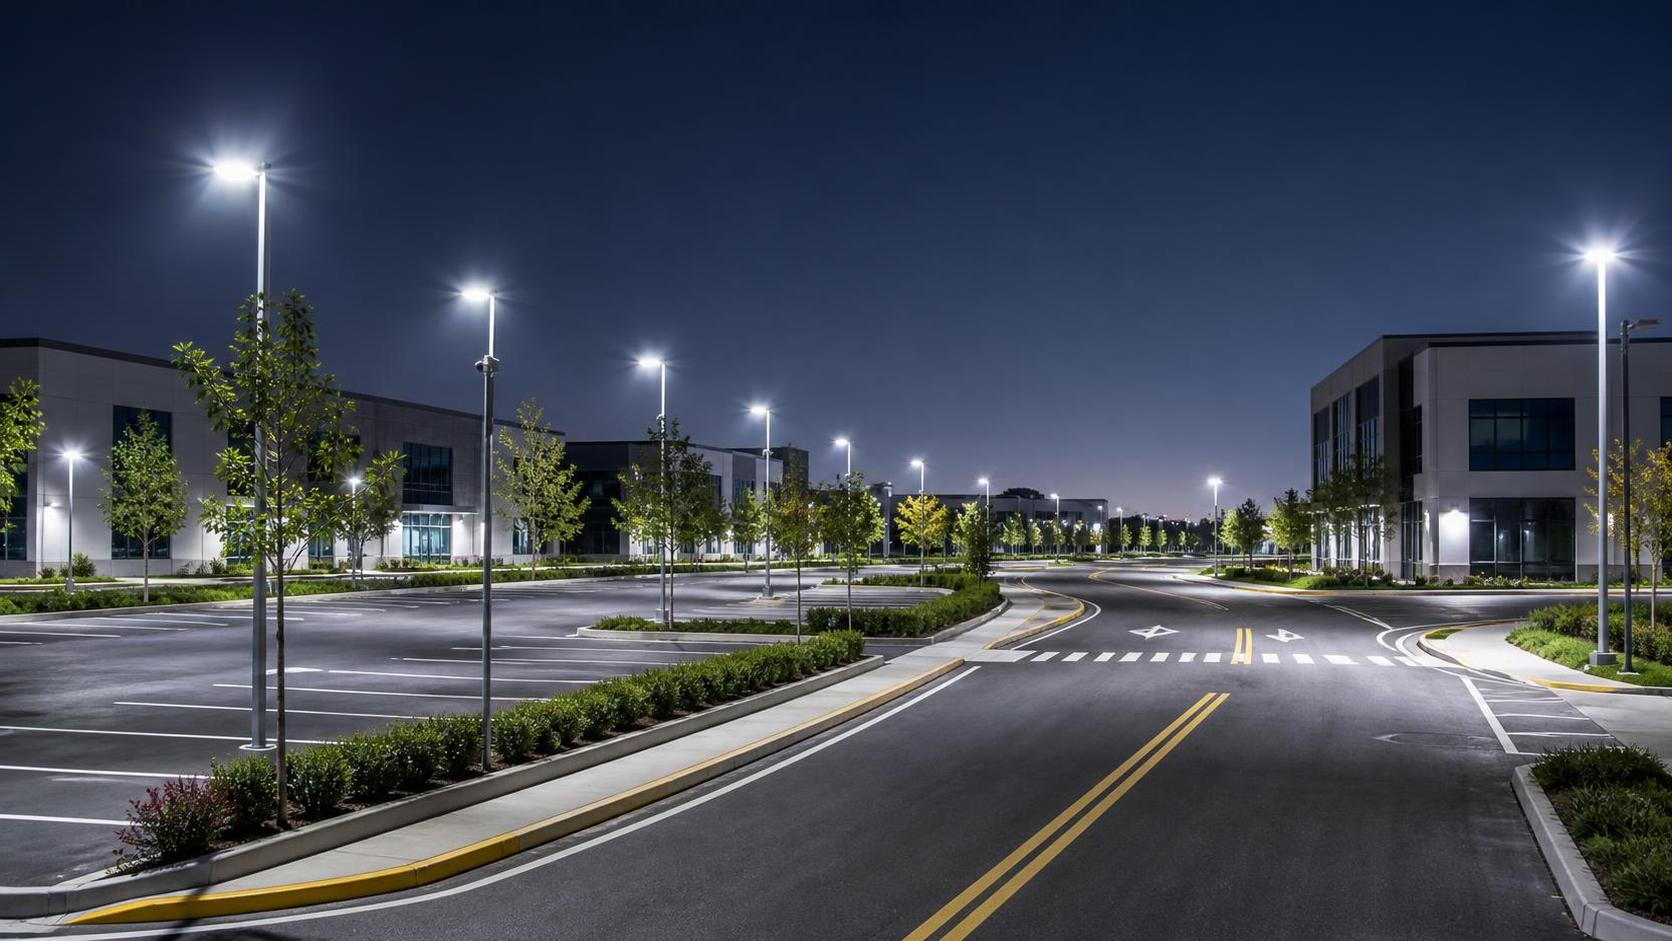
Effective outdoor LED lighting for parking lots and access roads starts with layout discipline. The first mistake usually appears before fixture selection: poles are placed by site geometry alone, then luminaires are expected to correct uneven spacing, blind spots, and glare afterward. A better approach is to map vehicle paths, pedestrian crossings, loading edges, gate areas, slopes, and conflict points first, then build the outdoor LED lighting layout around those conditions.
Parking lots rarely fail because the average light level is too low on paper. They fail because the lighting pattern is inconsistent. A bright area near the pole and a dark zone between rows can make curbs, wheel stops, drain grates, and pavement damage harder to read. Access roads have a similar problem when long pole spacing creates alternating bands of brightness and shadow. Uniformity matters because the eye is constantly adjusting while drivers turn, brake, reverse, and merge. In practical layout work, it is often better to slightly reduce peak brightness and improve spacing consistency than to over-light selected points.
Start with traffic behavior, not only lot dimensions
A rectangular site does not guarantee a simple rectangular lighting grid. Entry and exit lanes, security islands, barrier arms, turning radii, and service bays all affect where visibility is actually needed. Access roads should be divided into functional segments: approach zones, intersections, bends, ramp sections, and connection points to the main parking area. Each segment may need a different optic, mounting height, or setback distance.
For example, a straight access road can often accept wider pole spacing if the beam distribution remains controlled across the carriageway and shoulder. A curved section usually needs tighter spacing or adjusted orientation to keep the outer edge from dropping into shadow. In parking aisles, fixture placement should consider the direction of vehicle movement and reversing angles, not only stall count. Light that lands well on the driving lane but leaves the stall face dark can still produce poor visual guidance.
Use mounting height and beam control together
Outdoor LED lighting layouts often become inefficient when mounting height is chosen only from a civil drawing or an existing pole schedule. Pole height directly affects coverage diameter, glare angle, maintenance access, and the apparent contrast on the ground. A taller pole may reduce pole count, but if the optic is too wide, light can spill beyond the site boundary or wash out the edge definition of internal roads. A lower pole can improve scale and cutoff control, but too many poles may complicate foundations, cable routing, and vehicle clearance.
Beam distribution should be matched to the mounting height rather than treated as a separate decision. Wide optics may suit open parking fields where pole spacing is balanced and there are few vertical obstructions. Narrower or more directional optics are often better near perimeter roads, fence lines, ramps, and transitions where light must be pushed along a corridor instead of scattered into adjacent areas. This is also where fixture tilt needs careful review. Excessive tilt may create foreground brightness and direct glare while reducing useful light at distance.
Material and housing construction are not just durability topics; they affect layout reliability over time. Die-cast aluminum housings are commonly preferred for outdoor luminaires because thermal management influences lumen stability and driver life. If heat dissipation is poor, the planned layout may gradually lose performance unevenly across the site, especially where operating hours are long and ambient temperatures run high.
Pay attention to vertical visibility
Ground illumination alone does not resolve all safety concerns. In parking lots and access roads, vertical visibility helps drivers detect people, bollards, signs, entry equipment, and parked vehicle edges from a useful distance. A layout that produces acceptable horizontal readings can still leave faces, sign panels, and low obstacles visually flat. This is common when fixtures are mounted too far apart or when optics are selected only for maximum spread.
Vertical illumination becomes more sensitive near crossings, payment points, security checkpoints, and loading doors. If the site includes mixed traffic with pedestrians, bicycles, delivery vans, and private cars, the lighting arrangement should support recognition at multiple heights. That usually means reviewing fixture orientation and not relying on one broad flood pattern to solve every zone.
Watch the transitions
The hardest areas to light well are usually transitions: public road to private access road, open lot to covered drop-off, uphill ramp to flat parking deck, or gate lane to wider circulation area. Human vision reacts poorly to abrupt contrast changes. If one zone is strongly lit and the next zone falls away too quickly, the brighter section can make the darker section appear even less readable.
Transitions should be staged with overlapping light distribution. In some projects, an intermediate pole or a different optic near the boundary solves more problems than raising the light level everywhere. Surface reflectance also matters. New pale concrete, dark asphalt, pavers, and painted markings all return light differently. A layout that looks balanced in calculation can behave differently once materials are installed and weathered.
Common layout errors during project execution
- Poles are coordinated late, after drainage inlets, underground utilities, or tree pits are fixed, forcing last-minute relocation and distorted spacing.
- Fixture wattage is increased to compensate for poor geometry, which can intensify glare without improving the darker zones between poles.
- Access road edges are ignored during aiming, so the centerline reads clearly but the shoulder, curb return, or pedestrian refuge does not.
- Different color temperatures are mixed across expansion phases, creating inconsistent visual conditions and uneven surface rendering at night.
- Maintenance reach is overlooked; when drivers or surge protectors cannot be accessed safely, failed points may stay dark longer than expected.
Procurement choices can also alter the final lighting pattern. A substitute fixture may match nominal wattage yet differ in optical control, driver quality, surge tolerance, or housing size. Those changes affect both photometric performance and installation detail. Even a bracket with a slightly different outreach can shift the distribution enough to create missed coverage near aisles or curb lines. Packaging and transport handling matter as well. Lenses, seals, and brackets should arrive without distortion, because minor mechanical damage can change aiming or compromise ingress protection once installed outdoors.
Control strategy should be considered early, especially where operating schedules vary by zone. Main circulation roads, perimeter lanes, overflow parking, and pedestrian connectors do not always need the same lighting behavior through the night. Dimming can reduce energy use, but only if the lower setpoint still preserves uniformity and visibility in active areas. A layout that works at full output may become patchy when dimmed aggressively. Driver compatibility, control wiring, and addressing should therefore be reviewed alongside the photometric plan.
In mixed-use outdoor environments, a pattern-based feature element is sometimes added near landscaped gateways or arrival plazas. If such an area sits beside a parking lot entrance, a specialized fixture such as LED Pattern Projector may be used for logos, directional graphics, or controlled visual accents. When integrated carefully, specifications such as die-casting aluminum construction, IP65 protection, beam angle options from 20° to 60°, and DMX512 or manual scene control can support outdoor use without interfering with roadway visibility. The layout point is simple: decorative projection should remain separate from the task lighting layer and should never replace the luminaires responsible for pavement reading and vehicle guidance.
Installation tolerance affects the lighting result
Even a solid design can drift during installation. Pole verticality, bracket orientation, luminaire rotation, and actual mounting height should be checked against the drawing intent. A few degrees of misalignment repeated across a road section can produce visible striping or dark pockets. On sloped sites, installers sometimes measure mounting height from local grade instead of the intended reference level, which changes the distribution pattern from one pole to the next.
Commissioning at night is where layout assumptions should be challenged. This is the stage to verify glare at driver eye level, confirm that crossings and curb edges remain legible, and identify whether any fixture is over-tilted or under-reaching. If changes are needed, re-aiming or swapping optics in isolated locations is usually more effective than broadly increasing output.
Maintenance planning should stay tied to the original layout logic. Dirt accumulation on lenses, failed drivers, water ingress at cable entries, and damaged surge protection do not degrade the site evenly. Parking lots near landscaping, dust, or heavy traffic may lose performance faster in selected rows or perimeter locations. Regular inspection should therefore compare real nighttime conditions against the intended uniformity pattern, not just confirm that fixtures turn on.
Well-executed outdoor LED lighting for parking lots and access roads depends on spacing discipline, controlled optics, accurate installation, and a realistic view of how the site will operate after handover. When those pieces are aligned, the lighting reads clearly on the ground, at the edges, and through the transitions where most problems usually begin.
◉ MESSAGE
Blog
- LED Street Luminaire Specifications That Matter for Roadway Projects
- What to Evaluate When Selecting a Smart Street Lamp Manufacturer
- How to Prepare a Compliant Solar Lighting Bid for Public Infrastructure Projects
- LED Street Lighting Solutions for Urban and Municipal Roads
- LED Street Light Installation Guide for Road Projects
- LED Street Light Lifespan: How Long Do LED Road Lights Last?
- LED Street Light IP Rating: What Should Buyers Choose?
Message